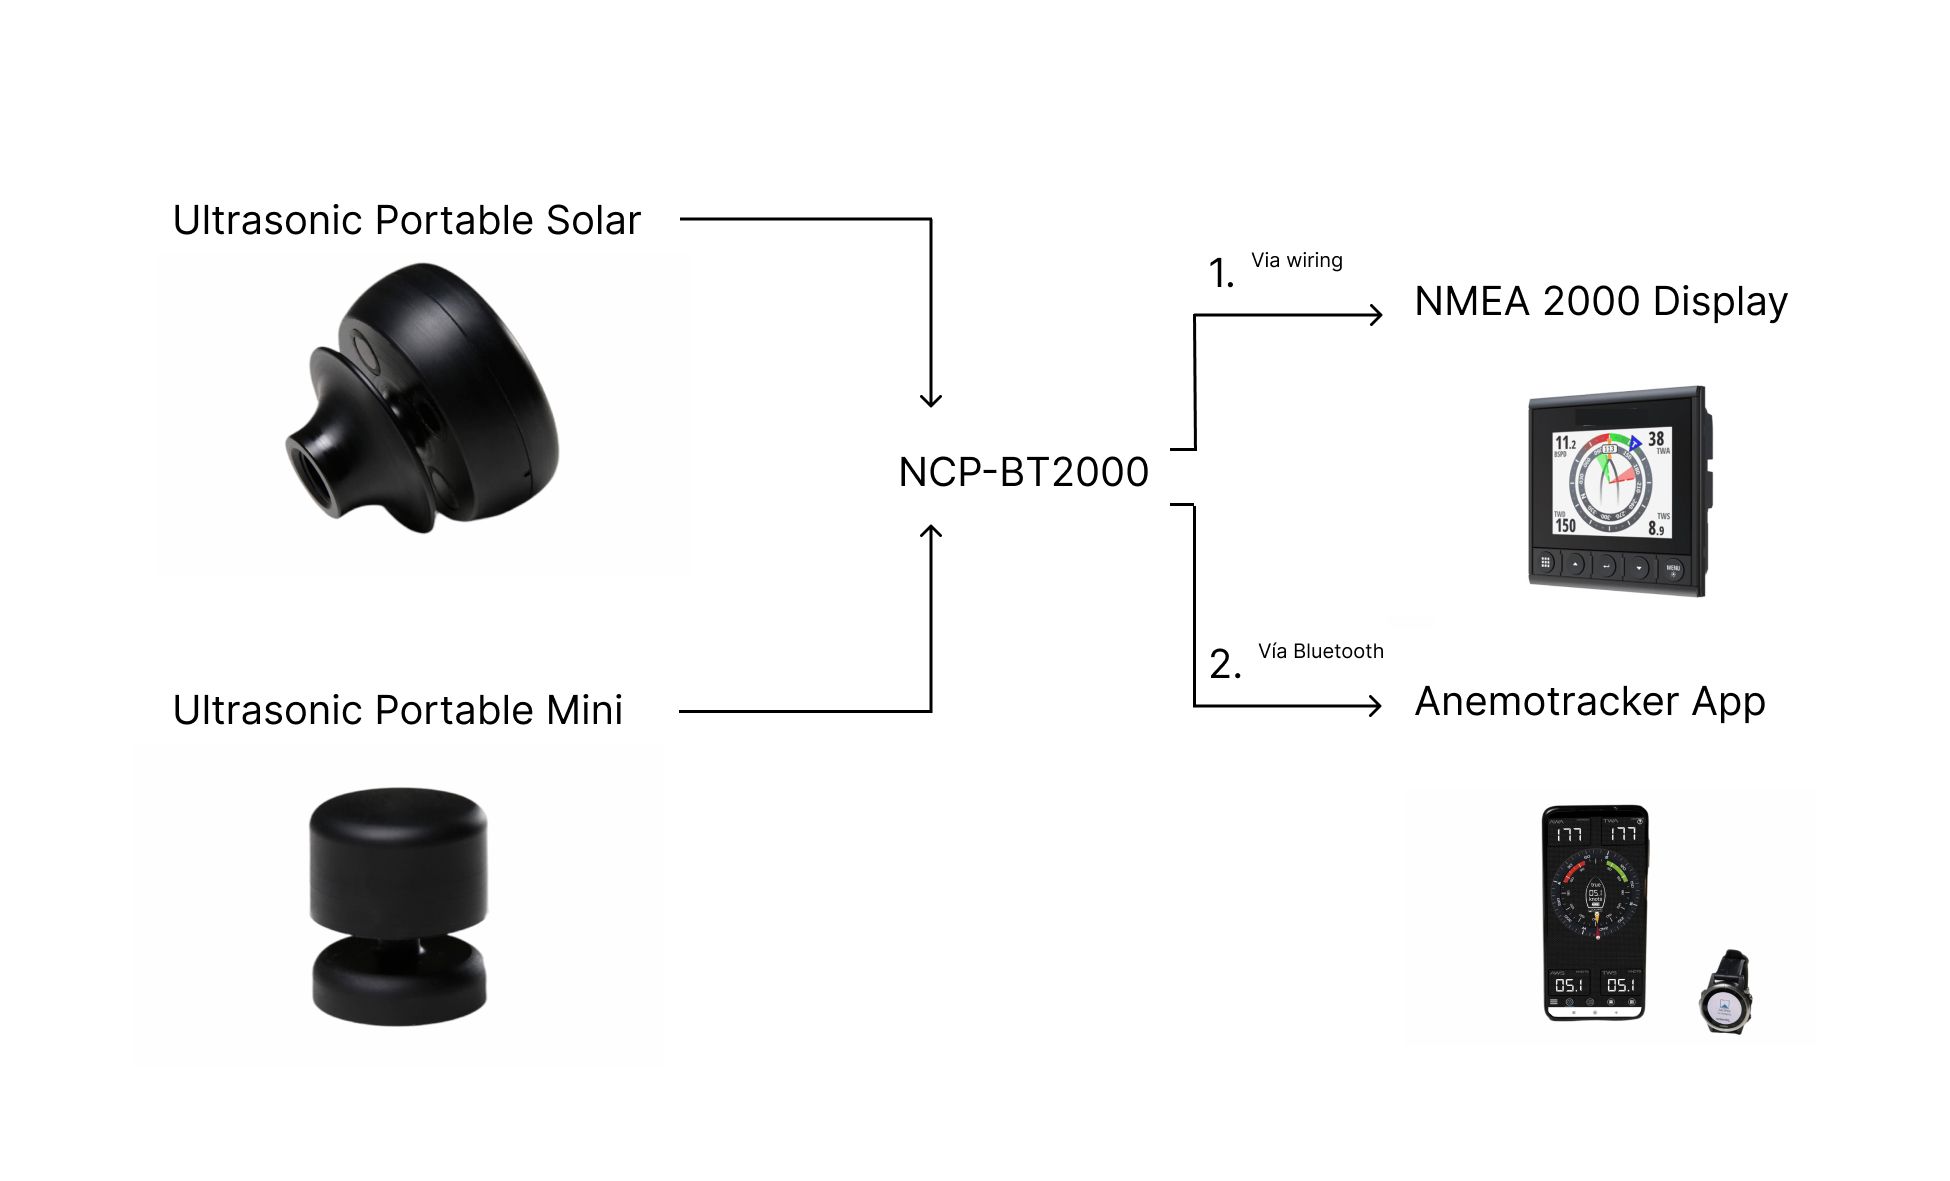
The Ultrasonic Portable Mini and Ultrasonic Portable Solar can be connected to the NCP-BT 2000 either via wiring to get data on a NMEA 2000 display , or via Bluetooth to get data through Anemotracker App.
How to configure the Ultrasonic Portable Solar/Mini to the NCP_BT2000.
Configuration Instructions:
Connect the NCP via USB to your computer. Confirm the green light is on in the NCP.
Look for the NCP wifi in the computer’s wifi options and connect to it by inputting the password found on the NCP.
Once connected, input the following IP address: 192.168.4.1 (found on the NCP).
Click on the Configuration Page. In BLE Configuration, input the MAC address of the Portable unit (Portable Unit MAC is found on the Portable Mini/Solar box). Hit save. Disconnect the USB cable from the computer, wait a couple of seconds and reconnect it.
Refresh the IP page and click on Status Page. You will see the NCP connected to the Portable MAC number you inputted.
Option 1: NCP_BT2000 to NMEA 2000 Display. Instruction to connect the NCP_BT2000 to a NMEA 2000 Display.
Plug the NMEA 2000 cable from the NCP_BT2000 to the NMEA 2000 backbone.
Option 2 : NCP_BT2000 to Anemotracker App.
How to Connect the Ultrasonic Portable Solar/Mini via Bluetooth from the NCP_BT2000 to the Anemotracker App.
On your mobile device, turn on Bluetooth and GPS.
Open Anemotracker App, allow app permissions and in the Settings Menu, click on Scan.
Find the NCP in available Bluetooth devices and select it. You can find it under the name NMEA 5.0.
Once connected, you can see wind data in the app.
You may follow the steps described on our last video :
You can have a look at the NMEA connections, specifications and documentation.